Thank you Honey We're Home for the detailed tutorial on how to get his done because it was so easy. I followed every step and after I cut the wood it may have taken me 30 minutes to get this whole thing together...minus waiting days for my fabric to arrive. Yes I was being incredibly impatient (it only took a few days to get here) but it arrived last night so I apologize but you get the tutorial today and the big reveal on Friday :) I will do my best to stop showing you half-a$$ed before and afters like I did this week, there is just never enough time in the day to finish all the projects I have floating around!
Hello jigsaw, and new saw horses. All I did was get Lowe's to cut down my plywood so it was a reasonable size for me to haul home:
Next I used my paper cut out of the window seat to trace onto the plywood. I made this during Hurricane Irene, it kept me busy for quite a while (ignore the laundry, I was trying to fold in the middle of projects).
I couldn't really take pictures while I was cutting (serious danger) so this is what it looked like when I was done. It fit like a glove, I am not even kidding, I shocked myself with how perfect it fit in the space. Beginners luck I guess.
This next part was a little more tricky. I had to add supports into the middle of the shelves because the top shelf would bend when people sat on it. The last thing I wanted was someone falling or breaking the shelf so I had to cut 2x6's to jam into the space. They had to have a very close contact to the shelf so that they wouldn't budge. I am pretty sure I achieved that since I was hammering these into place. I will end up painting them white and adding a couple cabinet doors for more storage but for now this is what we have:
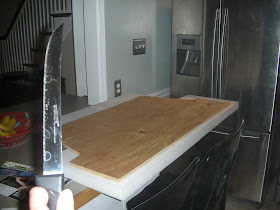
Now it's time for the foam. I bought 2 inch thick foam. I needed about five squares that I placed on the board to measure. Once I new how to place them I would lift each one up individually and spray the wood with Elmer's permanent spray adhesive. I am not sure how permanent this is on porous wood and foam but it worked for the next step which you see below. I had to turn the wood over so that I could cut off the excess with a serrated knife. I thought this was going to be hard but the knife went through it like butter! Easy peasy.
Speedo was a big fan!
This is the glue, just in case you need to run to the store to pick up a can for yourself.
This is the part that makes me worry less about the spray adhesive holding for all of eternity. The batting goes on top and will fasten to the bottom of the wood with a staple gun. I am pretty sure after the batting is secured and pulled tight, the foam will stay in place...let's hope anyway. Once the sawing ended the cats became the world's most curious helpers.
Like I said, this is almost done and you will just have to wait for Friday to see the finished product but this is where we are now. I think this seat is a real crowd pleaser, I am so happy with it so far!
What do you think? Anyone else out there in the middle of five billion different projects that need some finishing touches? Make me feel better and share them with me! Happy hump day!
See you swoon,


No comments:
Post a Comment